


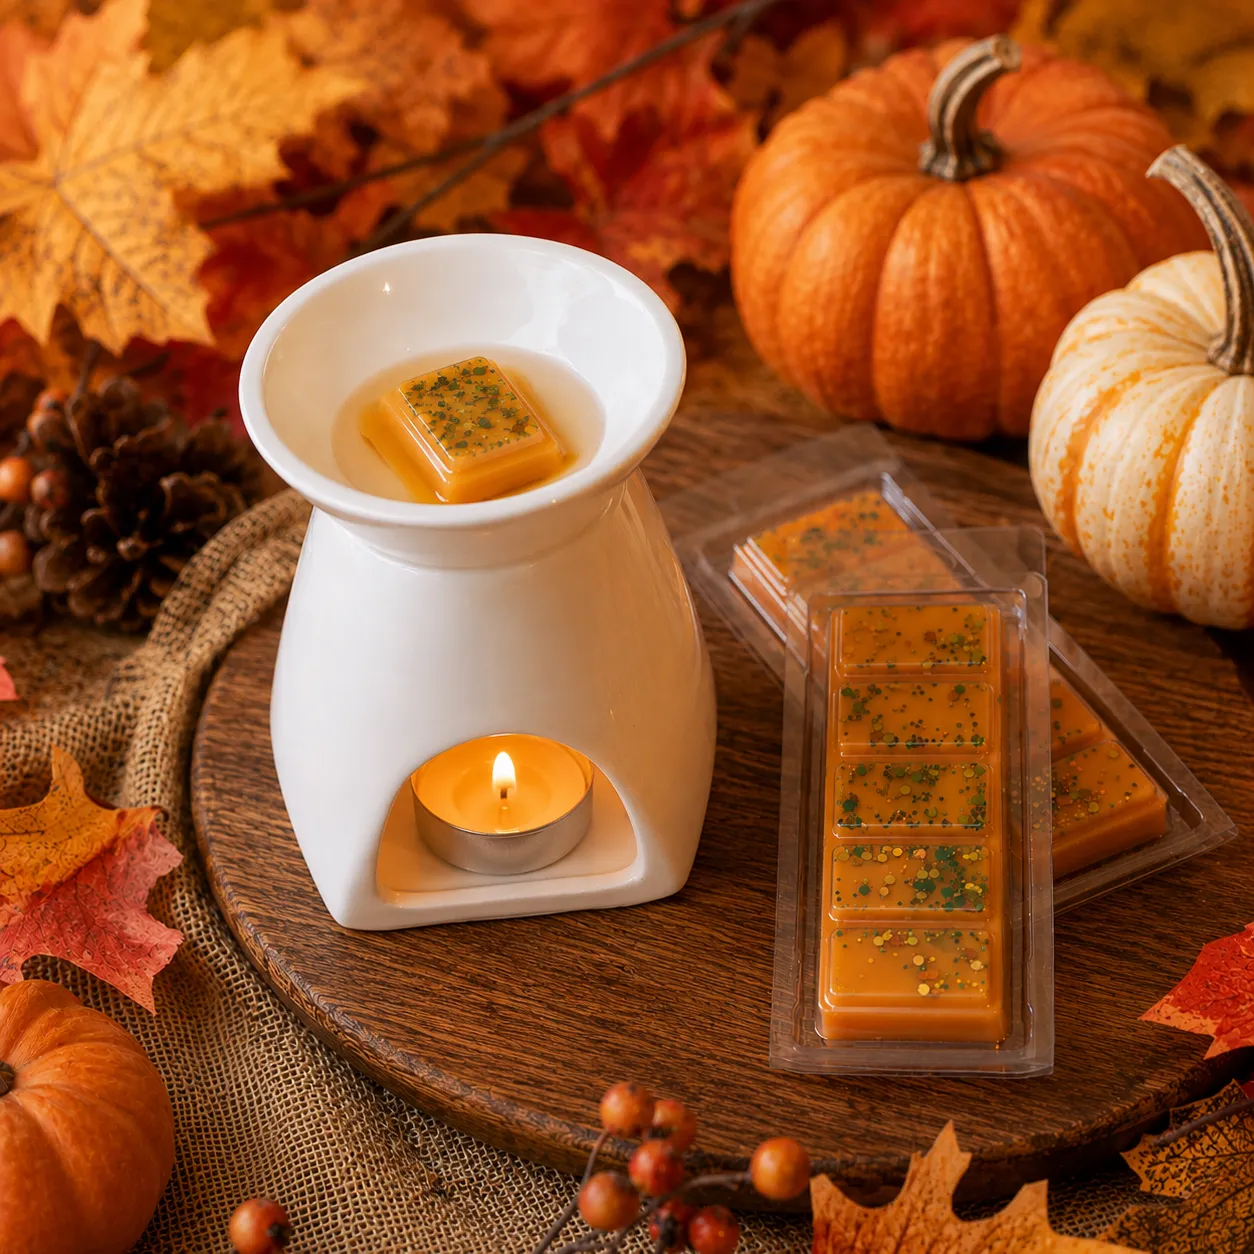

Get ready for autumn with these Pumpkin Patch Wax Melts! Combining a rich pumpkin-orange wax with green and gold decorative details, these snap bars are an easy way to create a seasonal wax melt that looks just as good as it smells.
Perfect for beginners, this tutorial will take you through the process step by step.
20 Minutes
Time to Complete
beginner
Difficulty
 | £2.50 – £150.00Price range: £2.50 through £150.00 ex VAT | Quantity Max: 19360 Min: 1 Step: 1 | |||
| £1.99 ex VAT | Quantity Max: 237 Min: 1 Step: 1 | |||
| £2.20 – £100.00Price range: £2.20 through £100.00 ex VAT | Quantity Max: Min: 1 Step: 1 | |||
| £5.90 – £94.50Price range: £5.90 through £94.50 ex VAT | Quantity Max: Min: 1 Step: 1 | |||
| £1.75 – £70.75Price range: £1.75 through £70.75 ex VAT | Quantity Max: Min: 1 Step: 1 |
- Digital scales
- Wax melting or pouring jug
- Thermometer
- Stirring utensil
- Protective gloves
- Heat-resistant work surface
| Ingredients | SKU | Percentages (%) | Measurements (g) |
| ProSoy Pillar Wax | WAX037 | 90% | 360g |
| Spice Pumpkin | FRAG0221 | 10% | 36g |
| Green Glitter | GLIT026 | As desired | |
| Orange Liquid Dye | LDYE003BT | As desired | |
| 5 Cavity Snap Bar | CLAM11 | 4 |
Step 1: Weigh Your Wax
Start by weighing out the amount of wax you’ll need for your snap bar moulds.
It’s always worth knowing the capacity of your mould before you begin so you don’t end up with too much or too little wax.
Place your wax into a suitable pouring jug ready for melting.
Step 2: Melt the Wax
Gently heat your wax until it has completely melted.
The exact melting temperature will depend on the wax you’re using, so always follow the manufacturer’s recommendations.
Stir gently as the wax melts to ensure there are no remaining solid pieces.
Step 3: Create Your Pumpkin Colour
Once your wax has completely melted, it’s time to create that gorgeous pumpkin-inspired orange.
Add a small amount of orange wax dye to your melted wax and stir thoroughly.
Remember that wax dye can be very concentrated, so start with a small amount. You can always add more if you’d like a deeper orange.
Continue stirring until the dye has completely dispersed and you’re happy with the colour.
Top Tip: Your melted wax may appear darker than it will once set, so keep this in mind when choosing your shade.
Step 4: Add Your Fragrance
Allow your wax to reach the recommended temperature for adding fragrance oil.
Weigh your chosen fragrance oil according to the recommended fragrance load for both your wax and fragrance.
Pour the fragrance into your melted wax and stir gently but thoroughly to ensure it is evenly distributed throughout the mixture.
For the ultimate autumn feel, pair your pumpkin-inspired design with a warming seasonal fragrance.
Step 5: Prepare Your Snap Bar Moulds
Before pouring your wax, make sure your snap bar moulds are clean, dry and placed on a flat, stable surface.
Keeping your moulds level will help you achieve an even finish across your bars.
Step 6: Pour Your Wax
Once your wax has reached the recommended pouring temperature, carefully pour the orange wax into each snap bar mould.
Fill each cavity evenly, taking care not to overfill the mould.
If you’re making several bars, try to pour them to approximately the same level for a consistent finished product.
Step 7: Create Your Pumpkin Patch Effect
While the surface of the wax is still warm, carefully sprinkle your green decorative glitter across the top.
Rather than completely covering the bar, scatter it unevenly to create the green, earthy effect seen in the finished Pumpkin Patch melts.
Follow with a small amount of gold glitter to add a subtle autumn shimmer.
Less is more here! You still want plenty of the pumpkin-orange base to show through.
For a more natural finish, vary the placement slightly between each snap bar. This will make every Pumpkin Patch melt look a little different.
Step 8: Leave to Set
Leave your wax melts on a flat surface to cool completely.
Try not to move or disturb the moulds while they’re setting, as this can affect the finish of your snap bars.
Once completely hardened, carefully remove each bar from its mould.
Step 9: Leave Your Wax Melts to Cure
Allow your Pumpkin Patch Wax Melts to cure for the recommended amount of time for your chosen wax.
Once cured, they’re ready to package, gift or pop into your wax burner.
Selling Your Pumpkin Patch Wax Melts
Planning to add your finished melts to your product range?
Before selling wax melts, make sure your finished products comply with all relevant legislation and labelling requirements for where you intend to sell them.
For UK makers, this may include requirements under GB CLP, depending on the ingredients and classification of your finished product.
Always refer to the documentation supplied with your fragrance oil and other ingredients and ensure the required information is displayed on your finished product where applicable.
It’s also good practice to keep accurate batch records, including the quantities of wax, fragrance, dye and other ingredients used.
Using Your Finished Wax Melts Safely
Once your Pumpkin Patch Wax Melts have finished curing, they’re ready to enjoy.
Break off the appropriate amount of wax and place it into the dish of a suitable wax melt burner.
Always follow the instructions provided with your burner, keep it on a stable and heat-resistant surface and never leave a lit candle or heated wax burner unattended.
Keep wax melts and burners away from children and pets.
Troubleshooting Your Wax Melts
Wax doesn’t always behave exactly as expected, particularly when you’re experimenting with a new wax, mould or design. Here are a few common problems you might encounter.
Why is my glitter falling off?
If your decoration isn’t sticking to the finished melt, the wax may have been too cool when it was added.
Try adding your decorative elements slightly earlier next time, while the surface is still warm and soft enough for them to adhere.
Why isn’t my orange as vibrant as I expected?
Wax often appears different once it has cooled and solidified.
If you’d like a stronger pumpkin orange, gradually increase the amount of dye in your next batch. Keep a record of how much you use so you can reproduce the colour once you’ve found the perfect shade.
Why does the surface of my wax look uneven?
Cooling conditions and pouring temperatures can affect the finished appearance of your melts.
Make sure you’re following the recommended pouring temperature for your wax and allow your melts to cool naturally on a flat surface without disturbing them.
Why has my wax frosted?
Frosting can occur naturally with some types of wax, particularly vegetable-based waxes such as soy.
It doesn’t necessarily mean there’s anything wrong with your wax melt, but experimenting with pouring temperatures and cooling conditions may help you achieve a smoother appearance.